Django Login with LDAP users
LDAP was designed to share common access details between applications. If a user is created in the LDAP server, the user does not need to register in other applications. You can use LDAP user credentials to login to the other apps.
All major applications provide configuration options with LDAP. Suppose you use Gitlab for your code repository manager. Gitlab provides configuration option with LDAP, it means you can log into the Gitlab with LDAP users. You do not need to register in the Gitlab for your login. Of course you can register there to login but why to do multiple registrations when you can manage multiple applications access using single database.
Similarly if you are developing a web application in Django. You can use Postgres or Sqlite database for your application but if the users who are going to register in the application already registered in LDAP, we can simply configure Django with LDAP and use LDAP credentials to log into Django Application.
Here is the method to configure Django with LDAP.
1. Create a virtual environment with Python. Here I have used Python 3.8.2
virtualenv djangoldap -p /usr/bin/python3
2. Activate the environment.
cd djangoldap && source bin/activate
3. Install Django Auth Ldap Module. I have used version 2.0.0
pip install django-auth-ldap==2.0.0
4. Now install Django 2. You can also install Django 1. It depends on your requirements.
pip install django==2.1.5
5. Now create a Django project using django-admin command. My project name is ldappro.
django-admin startproject ldappro
6. Run the Migrations
cd ldappro && python manage.py migrate
7. Add the LDAP configuration in the settings.py at bottom of the page below STATIC_URL
import ldap
from django_auth_ldap.config import LDAPSearch, LDAPGroupQuery,GroupOfNamesType,PosixGroupType
AUTH_LDAP_SERVER_URI = 'ldap://localhost'
AUTH_LDAP_BIND_DN = 'cn=admin,dc=example,dc=com'
AUTH_LDAP_BIND_PASSWORD = 'YourLDAPPassword'
AUTH_LDAP_USER_SEARCH = LDAPSearch('dc=example,dc=com',ldap.SCOPE_SUBTREE, '(uid=%(user)s)')
AUTH_LDAP_GROUP_SEARCH = LDAPSearch('dc=example,dc=com',ldap.SCOPE_SUBTREE, '(objectClass=top)')
AUTH_LDAP_GROUP_TYPE = PosixGroupType(name_attr="cn")
AUTH_LDAP_MIRROR_GROUPS = True
# Populate the Django user from the LDAP directory.
AUTH_LDAP_REQUIRE_GROUP = "cn=enabled,ou=groups,dc=example,dc=com"
AUTH_LDAP_USER_ATTR_MAP = {
"first_name": "givenName",
"last_name": "sn",
"email": "mail",
"username": "uid",
"password": "userPassword",
}
AUTH_LDAP_PROFILE_ATTR_MAP = {
"home_directory": "homeDirectory"
}
AUTH_LDAP_USER_FLAGS_BY_GROUP = {
"is_active": "cn=active,ou=groups,dc=example,dc=com",
"is_staff": "cn=staff,ou=groups,dc=example,dc=com",
"is_superuser": "cn=superuser,ou=groups,dc=example,dc=com"
}
AUTH_LDAP_ALWAYS_UPDATE_USER = True
AUTH_LDAP_FIND_GROUP_PERMS = True
AUTH_LDAP_CACHE_TIMEOUT = 3600
AUTH_LDAP_FIND_GROUP_PERMS = True
# Keep ModelBackend around for per-user permissions and maybe a local
# superuser.
AUTHENTICATION_BACKENDS = (
'django_auth_ldap.backend.LDAPBackend',
'django.contrib.auth.backends.ModelBackend',
)
8. Now run the python server.
python manage.py runserver
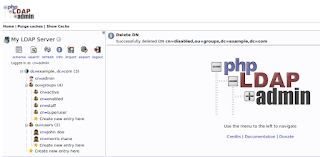
9. Open phpldapadmin and Create two 'Generic : Organizational Unit' users and groups .
10. Add a generic : Posix Group 'Active' under the OU groups and then add a generic : user account 'John Doe' under OU users. Select GID 'Active' while creating the user account.
11. After creating the user account, add two more objectClasses for the user i.e. person and organizationalPerson.
12. Add a generic : Posix Group 'Enabled' under groups with enabled checkbox of user jdoe.
13. Add a generic : Posix Group 'Staff' under groups with enabled checkbox of user jdoe.
14. Add a generic : Posix Group 'superuser' under groups with enabled checkbox of user jdoe.
15. Once user is added in the all the Posix Groups, we can log into the django using the LDAP user.
16. Now use the credentials of the user. Username of the user can be found on the user account page of the user and password was already set by you while creating the user.
You should be able to loginto the django using LDAP Credentials.
You can find complete solution in the following video.


